Sometimes, it's the easiest things that are the hardest to achieve. Like the perfect blowdry. An easy braid. Great volume.
Great volume. It can actually be pretty hard to achieve. Luckily, Aveda has our backs.
How are you with a round brush?
Showing posts with label Tutorials. Show all posts
Showing posts with label Tutorials. Show all posts
Tuesday, April 23, 2013
Tuesday, April 9, 2013
How To Tuesday: Twisty Turny
You guys...there are so many easy ways to pull your hair off of your neck. Cute, easy ways. Being a Texas...and it being April...the shadow of summer is looming overhead.
And my goodness does it get hot. If you have long hair, you know what it's like to feel it sticking to your neck with sweat. Ew. It's gross. But maybe you get tired of the same old pony tail routine.
Try this one out next time.
Step 1: tease


 |
| Get it? |
And my goodness does it get hot. If you have long hair, you know what it's like to feel it sticking to your neck with sweat. Ew. It's gross. But maybe you get tired of the same old pony tail routine.
Try this one out next time.
Step 1: tease


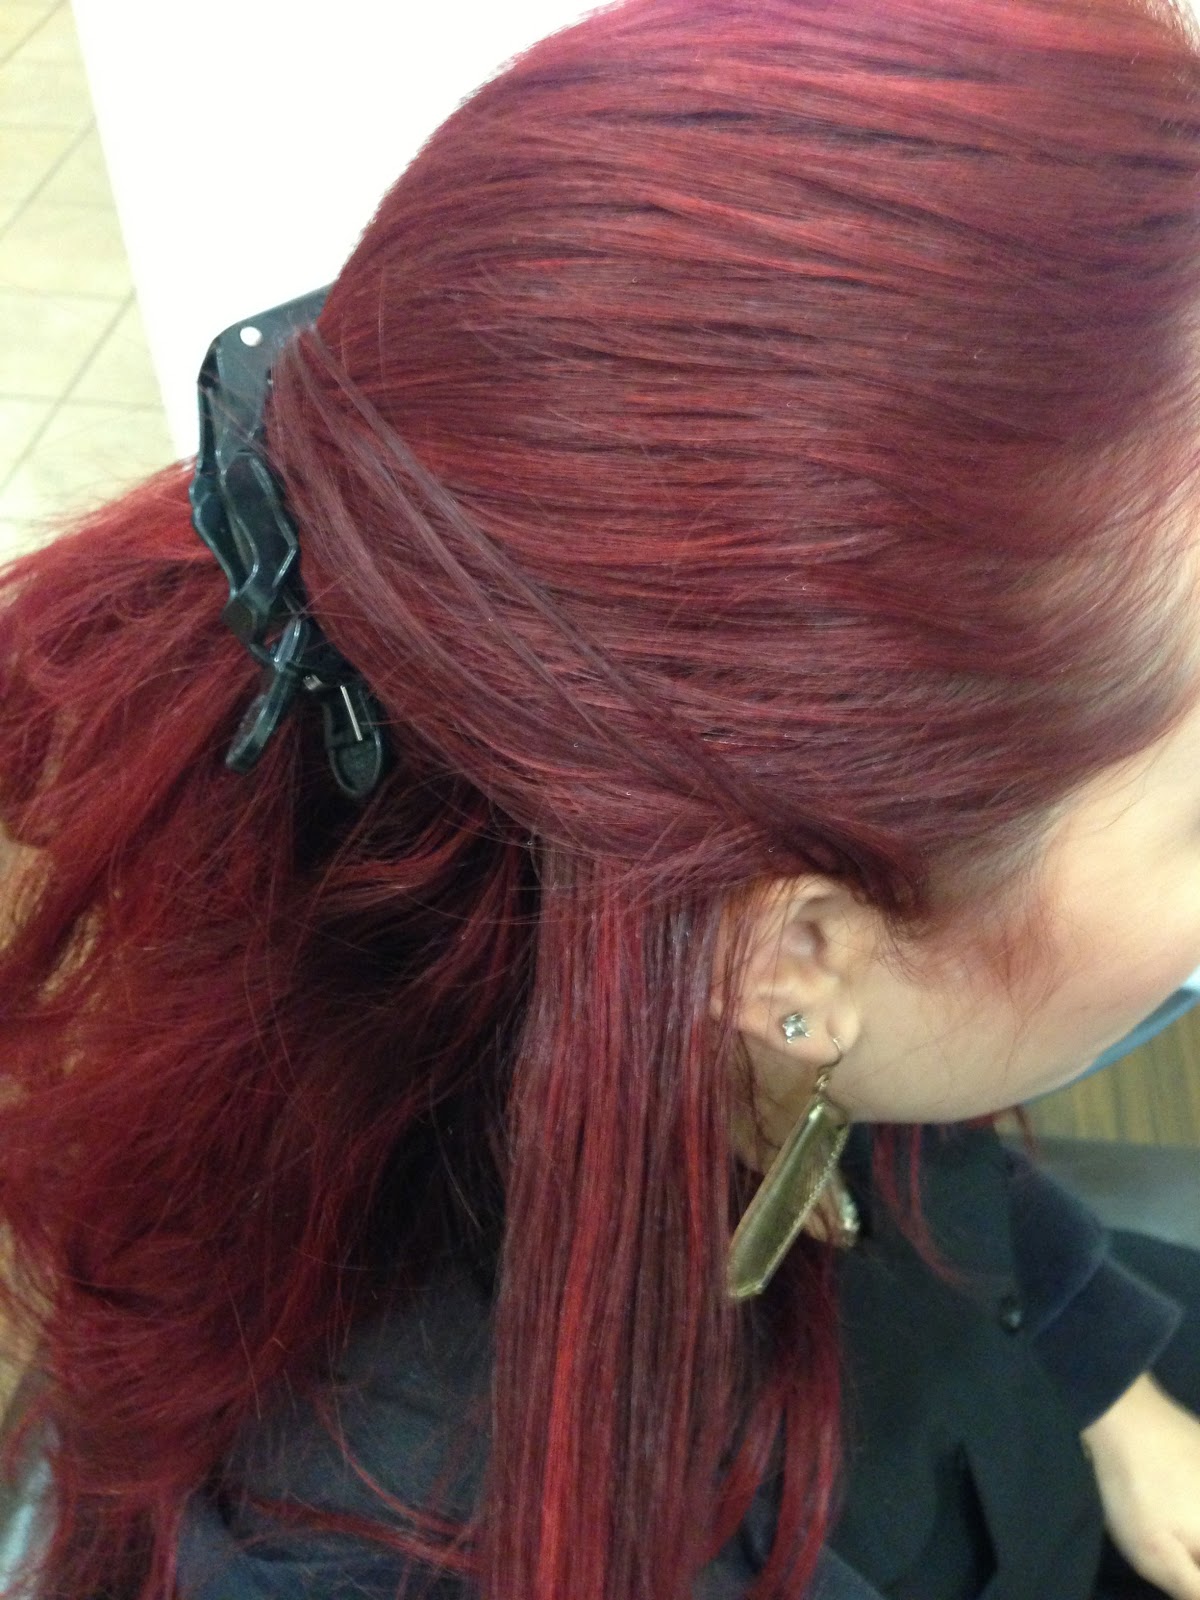
Most updos are easier when your hair is curled first. It helps to be able to twist and tuck. So start with it curled, then tease it big girl!
Step 2: twist and pin

Twist back both sides, leaving some face framers. Pin into place.
Step 3: roll up

I just rolled the rest of the hair up, and pinned it into place. It's off her neck, and way cuter than a pony.
That's all folks. Now, time to stock up on shorts and tank tops. Summer is coming.
Tuesday, April 2, 2013
How To Tuesday: Messy Hair Bun
Let's be honest...there are done we don't want to do anything to our hair. The last thing we want to do is get up early, fix your hair, and look presentable. I mean, I know I'd rather sleep that extra twenty minutes.
So this tutorial is for those days. For second day hair. Or third day hair. Or, hell, even fourth day hair.
Step 1: start will curled hair


So this tutorial is for those days. For second day hair. Or third day hair. Or, hell, even fourth day hair.
Step 1: start will curled hair

Step 2: tease the heck out of it


You want really big hair.
Step 3: pull it back into bun shape

I just pulled all of Amanda's hair back, then pinned it in a bun. I pulled a the bun to made it more full, and then pinned some stray pieces.
All in all, it took less than 5 minutes.


Cute. Easy. What more could you ask for?
Tuesday, March 19, 2013
How To Tuesday: Dewy Makeup
I like to start this post off by saying...


Ginnifer Goodwin is flawless. There has never been a time I looked at that girl and thought, wow, she could use a little work. I mean...she is freaking Snow White.

You see how dewy she looks? Like she is glowing. Well...that look can be achieved very simply using some highlighter.
Step 1: moisturize
It's arguably the most important step. If you're skin isn't moisturized, then the dewiness has no reason to look dewy. Does that even make sense?
Step 2: foundation
you can apply your foundation as normal.
Step 3: cheek contouring
Step 4: highlighter

You want to apply your highlighter in these areas. It's okay if you don't have an actually "highlighter", you can use any light colored eyeshadow. That one that you always use to swipe across your brows? It's perfect for this.
Do you have a moisture spray that sets your foundation? Make sure you use it!
Now...go be flawless like Ginnifer. I know you are.
Wednesday, March 13, 2013
How To Tuesday Wednesday: Make Your Eyes Look Wider
Due to some technical difficulties yesterday, I was unable to post this tutorial. But here it is now. In all it's glory.
People are always talking about trying to make their eyes appear wider, because let's face it...No one likes sad, closed eyes. So here's a quick tutorial on how to do so. It's very easy. It only involves two eyeshadow colors (nude and brown), eyeliner (black), and mascara (black).
Step 1: base color

Apply a nude shadow all over eyelid.
Step 2: crease


In the crease, apply your brown shadow, bringing it around to a point on the outer edge of your lid, sweeping lightly over outer lash line.
Step 3: liner

Black liner along top lash line. Apply it thicker toward the outside, thinning out as it reacher inner corner.
Step 5: mascara

ta-da! That's it.
Told you it was easy.

Tuesday, February 19, 2013
How To Tuesday: Pixie Poof
Today I stepped out of my little pixie box. For two months, I've worn it the exact same way every day. Don't get me wrong, it's super cute that way, but it was like wearing the same outfit every day. I can barely wear the same outfit twice.
We've done a tutorial in the past on a punk rock pixie, but I wasn't really feeling the "punk" today...so I decided to do a similar style, but more polished.


We've done a tutorial in the past on a punk rock pixie, but I wasn't really feeling the "punk" today...so I decided to do a similar style, but more polished.

Step 1: Product
While wet, apply some product that will give you some hold. I used Sebastian Whipped Creme. A light mousse, that also makes your hair super soft.
Step 2: Blowdry

You want to use a round brush to blowdry the hair away from the face.
Step 3: Flat Iron

Again, using the flat iron to smooth, direct the hair away from the face.
Step 4: Pin
Place hair exactly where you want, and use a couple of bobby pins to keep it there. Pin lightly, not too tight, to still give you that poof look.
Step 5: Spray
Didn't really think we'd get through a tutorial without telling you to hairspray did you?

Tuesday, February 12, 2013
How To Tuesday: The Perfect Lip
Valentine's Day is this week, and nothing says sexy like lip stick. It draws the eyes to your lips...and when the eyes are drawn to your lips...well..
Step 1: Line the lip


Step 1: Line the lip

Lining your lip will help to keep the color longer, but more importantly it will help keep your lipstick from bleeding. No one likes a bleeding lip.
Step 2: Lipstick
Use a lipstick brush. It will help with precision.
Step 3: Blot
Always blot.
Step 4: Lipstick again.
Second layer
That's it. Easy right?
I'd go with red for v-day.
Tuesday, February 5, 2013
How To Tuesday: Our Top 5 Tutorials
We've done a lot of tutorials. A lot. From makeup to hair to skin to headwear. And, if I do say so myself, they're all pretty good. But some of them stand out from the rest. Here's a list of our top five tutorials.
5. How to lock in a bobby pin
4. pin back your bangs

5. How to lock in a bobby pin
A pretty simple thing. Using a bobby pin. But it's only simple after you know how to do it.
4. pin back your bangs
Ah yes. The grown-out bangs. There's not much worse.
Highlights include The Poof, The Braid, The Twist, The Middle Part
No heat curls? Yes please.

Because let's be honest...who doesn't want them?
1. curling rod
Three words. Taylor Swift Hair.
Tuesday, January 22, 2013
How To Tuesday: Get This Look
We get "how do I do this?" a lot. Usually a client is holding a picture of a celebrity and commenting on their hair, or their makeup. But always they are wanting to recreate what they see in the picture. I do it too.
But wouldn't it be nice to look at a picture and be able to recreate it without having to ask your stylist or makeup artist? I think so. That's what today's tutorial is about. Learning to do it for yourself.
Let's take a look at Isla Fisher at The Golden Globes.

But wouldn't it be nice to look at a picture and be able to recreate it without having to ask your stylist or makeup artist? I think so. That's what today's tutorial is about. Learning to do it for yourself.
Let's take a look at Isla Fisher at The Golden Globes.

She's stunning right?
Now. Let's analyze.
First. Look at her hair. It's moderately thick. Is yours this way? Have you ever been able to achieve as much volume as she has? Or do you have super curly hair and have never been able to tame it without a team of professionals behind you?
Second. Start with what you know. You know that she used a curling iron. A large one, since the size of her curls are pretty much waves instead of curls. Look at her curl pattern. Are they all going the same way? Different ways? Toward her face? Away from her face?
We don't know what the back looks like, but we can guess. You could actually make this your own. Do you want it braided back there? Pinned? Or just swept to the side?
Third. Her makeup is simple. You can see her glowing, so you know she's using bronzer and a highlighter. Are these techniques you know how to use? If not, look them up.
Forth. Just do it. Try it out. If you don't get it right, start over. Sometimes it takes a couple of tries to master the perfect curl or get your winged liner even. It's okay to try over.
Tuesday, January 8, 2013
How To Tuesday: Shampoo Your Hair
Don't laugh. It needs to be talked about. Improperly washing your hair is a pandemic sweeping the nation...even the world. Like washing your face it is something you can just do without even thinking about whether or not you're doing it properly.
Luckily, you have me to save you from your improperly washed hair fate.

Step 4: shampoo
Luckily, you have me to save you from your improperly washed hair fate.

Step 1: soak your hair completely
Step 2: shampoo
You don't need a lot of shampoo.
"But Cassidy, it's doesn't lather properly without a lot!"
I know. That's why you have to wash your hair twice! The bottle doesn't say lather, rinse, repeat for nothing. The first time you wash your hair, really use your fingertips to break up all the dirt and oils on your scalp. It might not lather very well...but oil and water don't mix well.
Step 3: rinse
You don't have to worry about getting every last bit out on this go round.
Same amount of shampoo as last time. Maybe a quarter size or less. It should lather better now. Again, really work on your scalp. You don't really need to lather up your ends, the shampoo will wash them on the way out.
Step 5: rinse again
Now you want to make sure that you're getting all of your shampoo out.
Step 6: condition
ALWAYS condition. It deserves caps lock it's so important.
So, have you been washing properly?
Wednesday, January 2, 2013
The Top 10 Posts of 2012
I figured I needed my own "top of 2012" list. Let's take a look back at the most viewed posts of 2012.
10. How-to Tuesday: Headband Curls

8. How-to Tuesday: Tattoo Coverup


1. How-to Tuesday: Braided Mowhawk

10. How-to Tuesday: Headband Curls

8. How-to Tuesday: Tattoo Coverup


1. How-to Tuesday: Braided Mowhawk

There you have it! The top 10 posts of 2012. Did your favorite make the list?
Tuesday, December 11, 2012
How To Tuesday: Ombré Winged Liner
Holiday parties are coming up and you don't want to show up with your same-old eye shadow look, well at least I don't. So today I wanted to take a classic look, and jazz it up a bit.
Ombré Winged Liner. Simple. Yet jazzy.
Step 1: inner eye


Ombré Winged Liner. Simple. Yet jazzy.
Step 1: inner eye

We lined the inner eye to a little bit over halfway across using a copper liner.
Step 2: outer eye

Then we came back and finished off the eye with a black liner, blending it in the middle where the two colors meet.

If you have a hard time with the winged part, you can always use a sheet of paper to get a perfect line.
And that's it! Super simple and so pretty.

Tuesday, December 4, 2012
How To Tuesday: Short Hair Waves
Last week I curled my hair like I normally do, but because of the gross humid weather outside my curls quickly fell. But I ended up really liking the wavy look that the fallen curls left behind. But of course, no curls ever fall the same way twice, so I needed to find a way to recreate the look.
And I did. Yay me!
This look uses a 1.5" curling iron and three different techniques. If your hair is any shorter than mine, you could probably get away with using a 1.25" curling iron, but I wouldn't go any shorter than that. It will give you actual curls instead of waves.
Let me know what you think!
Tuesday, November 27, 2012
How To Tuesday: Double Braided Headband
I sort of have long hair envy these days. I mean, don't get me wrong, I absolutely love my short hair, but just doing this tutorial today I missed being able to do lots of different things with it. Which just means I need to do more short hair tutorials.
yeah that sounds good. But today is a medium to long hair tutorial. And it's super cute. Check it out.

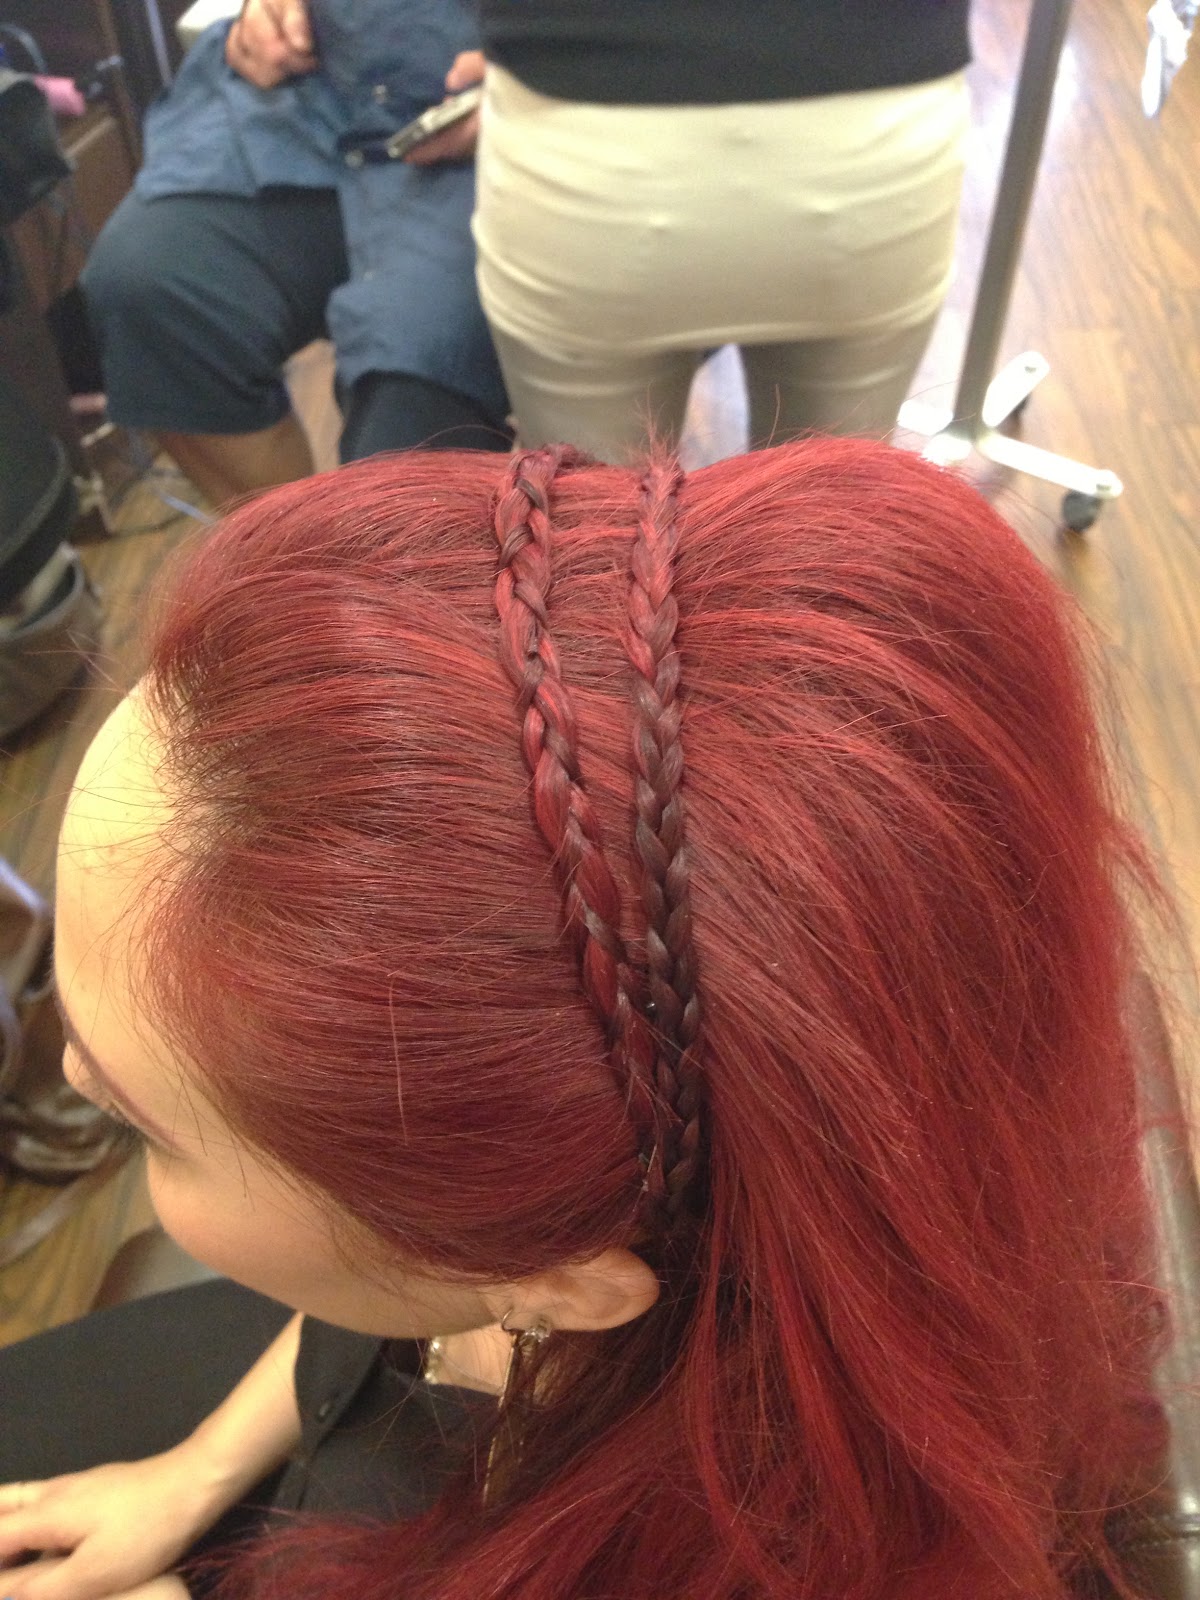
Step 1: section of the piece of hair to braid


yeah that sounds good. But today is a medium to long hair tutorial. And it's super cute. Check it out.

Step 1: section of the piece of hair to braid

You want to section off a small piece right behind the ear, that way, it pulls easy over the top of the head to form the headband. Then braid it all the way down, secure with a clear pony.
Step 2: Do the other side.
Step 3: Tease the crown

But be nice to it.
Step 4: Pin the braids
and that's it!

What kind of tutorials would you like to see me do? More short hair? Long hair? Tell me in the comments below!
Tuesday, November 20, 2012
How To Tuesday: Separating Your Curls
Hello, I'm back from vacation. Did you miss me? Oh stop it, you're making me blush.
Now that I'm back I knew the first thing I wanted to do was talk about separating your curls. When I curl my hair, which is pretty much all the time, all I want to do is get my hands through it and separate them. I don't know why, some obsessive compulsive thing I guess.
But let me tell you what I did that I shouldn't have: put my hands through my freshly rodded hair. Talk about afro. I just kept saying to my hair, "no! go back please!" You don't talk to your hair? Hm. Weird.
There are two methods to separate your curls. That's not true, there are a lot of methods, but I'm only going to tell you my two favorite.
Method #1: pick apart

This method is really good for tighter curls, a la Taylor Swift above. Basically, you're going to use your fingers to pick apart some curls, fluffing them out. But what's nice about this is that you're not doing every curls, so you don't get that afro look.
Method #2: run your hands through it
This method is definitely better for larger, looser curls. You just run your hands all through your curls, separating each one of them. This helps to let the curls fall, and depending on your desired look, create that more wavy outcome.
Bonus tip: put 'em back together
If you ever find yourself saying what I did, "please go back!" Don't worry, you can put those curls back together. Just pump a bit of styling oil into your hands, and gently twist each curl, grouping them back into place. It might take a little practice, but just work with it. That hairdo can still be salvaged!
Tuesday, October 30, 2012
How To Tuesday: Jane Iredale Party Makeup
It's my favorite time of year. Pumpkins. Turkey. Mashed potatoes. Presents. And parties. Every other weekend there is a party going on. Whether it's a halloween party, a birthday party, a wedding, or just a good ol' holiday party. It's party season.
And party makeup is on a whole different level. It's not daytime makeup and it's not nighttime/going out makeup. It's a nice in-between.
Jane Iredale does a fantastic job of showing you how to do a lovely party makeup look. I mean, I didn't even have to recreate it or anything.
Check it out below.
What do you think? I love the bronze colors that are used! What is your favorite color to do for a party?
Tuesday, October 23, 2012
How To Tuesday: Pin Up Makeup
One of the best things about Halloween, besides Pumpkin Spice Lattes, is getting dressed up and going to Halloween parties...and the candy, can't forget about the candy.
But I love getting to be someone else for a night. We get asked a lot how to do vintage style makeup. It's a big look that people want to do, but don't really know how. Good thing is, it's super easy.
And now you'll know how.
But I love getting to be someone else for a night. We get asked a lot how to do vintage style makeup. It's a big look that people want to do, but don't really know how. Good thing is, it's super easy.
And now you'll know how.
Tuesday, October 16, 2012
How To Tuesday: Treating a Burn
Before I begin...
I am not a doctor. Or any kind of medial professional...so take my advice all at your own risk.
There. Glad I got that off my chest.
So you know what sucks? Burning yourself with a 400 degree hot tool. What it does to the skin is not a pretty thing. And in our line of work, burning yourself is an everyday thing, so we've learned a couple of tricks over the years.
Prevent the burn. This is the biggest advice I could give. Do what you can to prevent the burn. Seems simple right? For example, this morning I used my rod for the first time since I burned myself with it (it was bad, I thought I was going to have to go to the hospital) so I put on long sleeves, and actually used that protective glove they gave me. No burns today.
But if you do get burned... they say to run it under water for a reason. It really does help. And not for just 30 seconds. You really have to run it under for a long time. Start with 5 minutes. Then see how it goes from there. Check the degree of the burn. If it's really severe, consider seeing a doctor.
Home remedies. There are a thousand home remedies out there. On my last burn I kept mustard on it all day that first day. But be careful what you use...you could be allergic or it could irritate your burn even more.
Burn creams. They are pretty good to have on hand in your medicine cabinet. Just stock it up with one like you would with a pain reliever or hydrogen peroxide.
Speaking of pain relievers. Take one.
Keep it clean and dry. And whatever you do. DO NOT pop the blister.
What are your secrets to treating a burn?
Tuesday, October 2, 2012
How To Tuesday: Jimmy Neutron
You guys remember Jimmy Neutron right?

Yeah that guy. The one with the big hair. Well, I'm a firm believer in the bigger the hair, the closer to God. And man, does Jimmy know what's up.
So one of our stylists does her hair in this certain way. We like to call it "The Jimmy Neutron", because, well, it looks like Jimmy Neutron.
I share it with you today.
And my friends...the bigger the better.
Tuesday, September 25, 2012
How To Tuesday: Chevron Accent Nail
This post comes with a small disclaimer:


This is Cassidy's first time doing nail art. Do not judge her.
Whew, I'm glad we got that out of the way. Guys...it took me an hour and a half to paint my nails for this tutorial. You know when the last time it took me that long to paint my nails was? Never. Because there's no way I would ever paint my nails if it took that long.
But luckily for you guys, I worked out all the kinks in this tutorial, so hopefully it won't take you that long.
For polish, I used one metallic (Color Club's Put a Pin In It) and one regular finish (Ulta's...some pink color that I couldn't find the name of).
Step 1: bottom coat

Two things: 1. I'm only doing an accent nail on my ring fingers, but you can do all your nails if you feel over-achieving. 2. I put the metallic first, but I think when I do it again, I'll put the regular first.
Let it dry. all the way.
Step 2: shapes & paint

The reason it took me so long was that I couldn't get the tape right. It wouldn't cut and then it wouldn't peel off. My mom suggested painter's tape and this worked like a charm.
So basically, you get your craft scissors that make cool shaped lines. Cut some tape and place it where you want.
Then you want to paint over it using your other color. Pull off while still wet.
Step 3: top coat
a top coat is important since you've got two different polishes on.
Paint the rest of your nails, and ta-da!

Subscribe to:
Posts (Atom)