Showing posts with label Skin. Show all posts

Wednesday, February 27, 2013

What is Keratosis Pilaris?

Sounds scary right? But don't worry...keratosis pilaris is something that lots of people deal with and it's not life threatening.

Wikipedia describes it as:

a common, autosomal dominantgenetic follicular condition that is manifested by the appearance of rough, slightly red, bumps on the skin. It most often appears on the back and outer sides of the arm


Simply put, it's those little red bumps that some people get on their arms. Somewhere around 40% of the population suffer from it.  

What happens is, the body produces too much keratin. You know keratin, it's a natural protein found in your skin and hair. So this extra protein has no where to go, so it surronds the hair follicles in the pore, producing little bumps. A lot of times, this causes ingrown hairs to form. 

So what do you do if you have it?

Well, there has been some research the links a deficiency in Vitamin A to keratosis pilaris. So make sure your getting some Vitamin A. 

You also will want to exfoliate the area, to help out with those ingrowns. 

And of course, moisturize. 

Tuesday, January 29, 2013

How To Tuesday: Do Your Own Waxing

I preface today's tutorial with this:

Yes, you can in fact rip that strip off yourself, leaving in you in large amounts of pain. You can do it! If I got over it, you can too.

You'll need:

  • wax, obviously
  • large popsicle sticks
  • wax strips, cut in half hamburger style


Step 1: gather the wax 


You want to do it quickly. Because otherwise it will dry, and then it hurts worse.

Step 2: apply the wax


When applying, you want to go with the grain. Go in the direction of the hair. The wax should be not too thin, not too thick.


Step 3: press and rip!


Press it down very well. Gather your courage, and pull it off against the grain!

Step 4: repeat. a lot.

You can use the same wax strip over a couple of times even though it was wax and hair on it. But only 2-3 times. Then grab a new one.

Also, don't put wax on the parts of your skin that you've already waxed. That's fresh skin under there. It can stand to be pulled off again.


Be brave.

Check out our post of the do's and don'ts of waxing before you do this at home yourself!

Thursday, December 20, 2012

Winter Chill

I've talk about winter on this blog before, or more specially, your hair care routine in winter. But when I looked down at my hands this morning, in the 46ยบ weather mind you, and silently screamed at what I saw. Okay, maybe it wasn't so silent.

The cold weather was reeking havoc on my skin. My poor hands were dry and cold and lonely. So after I rubbed them together, let them be friends for a bit, I decided I needed to take better care of my skin in this dry winter weather.

And since I assume that all you lovely readers have the same problems I do, obviously I'm going to share some tips.


Try a hand or body scrub. Scrubs are super fantastic. I used one while I was on vacation on my hands, and they felt super soft for days after. Not only will a scrub exfoliate your skin, but it will also leave you feeling silky smooth after it's rinsed off.


Moisturizer. Obviously. Find yourself a really good one. I love Aveda's Hand Relief. It penetrates deep down and really leaves your skin moisturized. Put one everywhere. In your purse. At your desk. By your bed. I promise, your hands will thank you later.


Wednesday, December 19, 2012

Are You Washing Your Face Properly?


I know what you're thinking. How hard is it to wash your face? Well, not that hard. But like most things, there is a right and...less right way to wash your face.

You really want to get in there and get those pores clean. Washing your face can be just a mindless task, but do your pores a favor and treat 'em right.

First though, you don't want to just grab any old soap. You really need to find the right product for your face. It might take some trial and error, or a chat with a skin care professional, but either way, make sure your using the right product.


  1. You want to wet your face with warm water. Not hot. Not cold. Warm water opens up the pores and lets your cleanser really get in and clean.
  2. Don't overload your face with product. It doesn't take a lot of cleanser to do your whole face. Try a dime or nickel size amount. 
  3. Use circular motions all over your face. You want to spend a good amount of time cleansing. Somewhere between 30-60 seconds. Don't just slap it on, rinse it off, and except it to have cleaned.
  4. Rinse your face with the same warm water you used to wet it to begin with.
  5. Pat dry.
  6. Moisturize and any other product you use. but moisturizer is the most important.  


Do you already wash your face this way? Or have you been just throwing it on and going?

Wednesday, November 28, 2012

Men's Shaving 101

It was brought to my attention that my shaving 101 post from last week was significantly female oriented. I can't have that on my conscience, so you are gentleman.

men's shaving 101


always shave on wet skin, much like how women need to, so you do boys. because razor burn on your face has to suck.

quality products, that includes your shaving cream and your razor. your face is the first thing people see, you want to take care of it. and for God's sake, make sure you change your blades.

with the grain, unlike on legs, men need to shave their beards with the grain of the hair. going against it tends to cause redness and irritation. you also don't need to press down as hard as you might think. let the razor do its job properly. and if your beard is really grown out, trim it down first. it will help, i promise.

rinse and soothe. you want to soothe down your face after you have just shaved. use a product that has tea tree oil or witch hazel, both good for soothing and calming the skin.


As I am not a man, I could be getting this totally wrong. So tell me gentlemen, what are your shaving tips?

Tuesday, October 16, 2012

How To Tuesday: Treating a Burn

Before I begin...

I am not a doctor. Or any kind of medial professional...so take my advice all at your own risk.

There. Glad I got that off my chest.

So you know what sucks? Burning yourself with a 400 degree hot tool. What it does to the skin is not a pretty thing. And in our line of work, burning yourself is an everyday thing, so we've learned a couple of tricks over the years.


Prevent the burn. This is the biggest advice I could give. Do what you can to prevent the burn. Seems simple right? For example, this morning I used my rod for the first time since I burned myself with it (it was bad, I thought I was going to have to go to the hospital) so I put on long sleeves, and actually used that protective glove they gave me. No burns today.

But if you do get burned... they say to run it under water for a reason. It really does help. And not for just 30 seconds. You really have to run it under for a long time. Start with 5 minutes. Then see how it goes from there. Check the degree of the burn. If it's really severe, consider seeing a doctor.

Home remedies. There are a thousand home remedies out there. On my last burn I kept mustard on it all day that first day. But be careful what you use...you could be allergic or it could irritate your burn even more.

Burn creams. They are pretty good to have on hand in your medicine cabinet. Just stock it up with one like you would with a pain reliever or hydrogen peroxide.

Speaking of pain relievers. Take one.

Keep it clean and dry. And whatever you do. DO NOT pop the blister.


What are your secrets to treating a burn?

Thursday, August 2, 2012

Acne Map

I posted a link to an article a couple of weeks ago about how where your breakouts are on your face can tell you things. Then, I was reading a magazine in the salon and found an article about the same thing. It's interesting stuff.

The top Murad educator and Chinese medicine scholar, Julieta Vidal-Lubin says that the position of your acne is trying to tell you something about yourself.

If your acne is on your...

forehead: this could mean problems with your stomach and digestion. If you have too much sugar (from things like sweets, breads, pasta, or alcohol) it causes excess yeast. A sign of this is those tiny, inflamed congested areas on the forehead. also try cutting down on your salt. it can cause you to be over oily...thus the pimples.

above your eyebrow: this could be a sign of problems with your adrenal glands, also known as your stress regulators. If your stressed out, take some time to relax. It could help with your breakouts.


chin and marionette line: the PMS pimples


jawline and neck: another hormone and adrenal gland indicator. slow down girl!


**all information from Beauty Launchpad magazine

Thursday, June 21, 2012

Soft, Kissable Lips

No one looks at dry, cracked lips and thinks, "those I want to kiss." Kissable lips are soft and moisturized and puckered. And come on, that's what we all want...just in case we ever happen to run into Chris Hemsworth on the street, we'll be prepared.

These lips say, "I know you can't take your eyes off me. Just go ahead and do it already."

Tips for your perfect pout:


  1. exfoliate. every morning after brushing my teeth I brush my lips off as well. but you can try a scrub if you don't want to do that. 
  2. moisturize. but be careful what you reach for. some lip balm (even the medicated kind) will just dry out your lips to keep you coming back. look for things like petroleum jelly, petrolatum, white wax, paraffin wax, and mineral oil and make sure you stay away from them.
  3. color. a pair of colored lips always draws the eye. so pick your perfect shade, or have someone help you pick it, but whatever you do, make sure you have a go-to color!


What are your soft lip secrets?


photo

Wednesday, June 6, 2012

BB Creams: What are They?


There's been a lot of talk on the market about a new product simply called BB Cream. What does the BB stand for you ask? Well...

BB originally stood for blemish balm, but has since become to be known as beauty balm. The product has been around for a while, dating back to the 1950s where it was designed by a German dermatologist for post-laser treatments. But the skincare-meets-makeup product rose to fame in Asia, where it was named "the secret of Korean actresses." BB cream then, of course, made its way over to the Western world.

The product comes in a variety of formulas, but the basic gist is that it is an all-in-one stop. I hate layering cream after cream on my face in the morning, mainly because as soon as I step outside it's just going to melt off, or at least it feels that way. So now, I throw that BB on and I'm good. I'm not having to do four different steps. Sunscreen, moisturize, anti-aging, foundation. It's pretty fantastic.

There are a couple of different companies that offer BB cream, from Dr. Jart (the one that I use) to Dior. But I'm super excited to say that jane iredale is coming out with one this summer. As the leader in skincare makeup, I'm excited to see how awesome their product will be. Because let's face it? It's going to be awesome.

Do you use BB cream? Which one? Tell me in the comments below!


photo, info: wikipedia

Thursday, May 3, 2012

Homemade Remedies: DIY Wax

Remember that recipe for homemade wax I posted in the Link Love a while back? Well, I thought I'd give it a try myself to see how it worked.

I'm all for saving money and while I don't really like to inflict pain upon myself, I did it. All for you my lovely readers.


Professional Wax
I prepared my legs just like I have been talking about all week and was excited (and a wee bit nervous) for my wax appointment today. It went well, pretty much like every other wax I've had. It hurt a lot. I made a lot of noises. We laughed. It was a good time.

I still have a bit of left over hair. Although, they are small, bitty white hairs that the wax won't pick up. After 24-48 hours I will be able to shave them away.


DIY Wax
Here's the recipe:
2 cups sugar 
¼ cup water 
¼ cup lemon juice

Heat over low heat until sugar is thick and brown.

It took forever for it to turn thick and brown. So long that I thought I was doing something wrong. I reread the instructions 17 times. Honestly it probably took almost 30 minutes for it to look like the picture above. And I had even cut the recipe in half, and then in half again (I had no idea I was almost out of sugar!

Now. Let me list the reason for you to never try this. ever.
  1.  I pretty much ruined a saucepan
  2. I burnt the bajesus out of three of my fingers
  3. and my leg
  4. The wax didn't come off of my leg with the cloth strip, I instead had to pull it off...slowly and painfully.
  5. It didn't take much hair off.
Are five enough? Or should I keep going?

Needless to say...I'll be back in the wax room again tomorrow finishing what the nice wax lady started. 


Wednesday, May 2, 2012

The Do's and Don'ts of Waxing

Waxing can be sometimes be a sticky (ha!) situation. Like I talked about yesterday, there are a lot of rules surrounding waxing that some people might not be aware of. 

Aren't you glad you have me (and the power of Google) to help you out? 


Don't...
  • Don't drink any coffee, caffeinated beverages, or even alcohol before your appointment. While you think they might come in handy, those drinks can actually make your skin more sensitive. Which equals more ouch. 
  • Don't touch your freshly waxed skin. Your hands carry loads of bacteria. You don't want any of that getting onto your open pores, causing an infection.
  • Don't go tanning for 24-hours after your appointment. 
  • Don't take a hot bath or get in a hot tub for 24-hours after. 
  • Don't worry! They are professionals, and know what they're doing. 


Do...
  • Do take a pain killer half an hour before your appointment.
  • Do exfoliated the area before you go in.
  • Do make sure your hair is around 1/2" long.
  • 24-48 hours after your appointment, do exfoliated again.
  • Do relax! Holding tension in your body could make your experience more unpleasant. 


All you experienced waxers out there...what are your do's and don'ts?

Wednesday, March 21, 2012

Homemade Remedies: DIY Pore Strips

If you read Link Love you know all about my obsession with DIY things. But here's a little secret...I hardly ever actually do anything DIY. Shhh!! I know, I know, super lame right? But I hardly ever have time to do anything DIY. It's so much quicker for me to just pop into the store and buy whatever it is I was going to DIY. Yes, I spend more money, but I gain knowledge. Wait..no..I guess that saying doesn't really apply here.


But to appease my inner DIYer I decided to try out some pore strips. Easy to start off with right? Then I asked myself...do they actually work better than the store bought kind? And boom! Blog post idea. 


So here we are:

homemade pore strips vs. Biore pore strips


The recipe I'm using (or stole from these people) for the DIY portion of today's show is as follows:

  • combine 1tbsp. honey with 1 1/2 tbsp. milk
  • microwave for 10-15 seconds
  • apply to face where desired


I put the Biore on my nose and the homemade on my chin and forehead area.

15 minutes later...


Biore Pore Strip


Let me first start off by saying, don't ever google image search Biore pore strips. Ew.

I always forget that these things never work the way I want them to. I expect them to pull out every blackhead in my nose, leaving it perfect like a baby's bottom. And let me tell you what it does not do: leave my nose looking like a perfect baby's bottom. There are still tons of blackheads up in there and I can't tell if the little things that the strip pulled out are small little blackheads or tiny hairs that I had on my nose. Some of them are probably blackheads. I can't have that much hair on my nose.

rating: B-


Homemade Pore Strip


When I put it on (using a cotton ball) it smelled so delicious I wanted to eat it. But then I put it on and was instantly deterred from eating. It was just this giant sticky mess on my face. Yes, it went on in a film like manner, but it just looked shiny and gross when it dried. 

Then I tried taking it off. Tried. Because that stuff wasn't coming off. It is suppose to just peel right off like a normal pore strip, but the mixture must of really liked my face because it stayed on really nicely. I ended up having to rewash my face and in the end, there was no blackhead difference. 

rating: F


I'm not sure why the DIY version didn't work out for me. Maybe I mixed it wrong, or didn't apply enough, I don't know, but there are a couple of other recipes for homemade pore strips out there that I might try next.


Do you DIY? What is your favorite homemade remedy? 

Thursday, February 2, 2012

Diet and Exercise: They're Pretty Important

Remember that John Mayer song "Your Body is a Wonderland"? Well, it's kind of true.

"Something 'bout the way the hair falls in your face..."

 Maybe you've studied anatomy and physiology, maybe you haven't, but the human body is amazing. Just take my word for it. It works in perfect harmony. Meaning, you need to have a good diet and exercise to have good hair and skin. Here are a couple of easy changes that you can do today.

Drink more water.
Water is great for your skin. Water is great for living, but it is also great for your skin. Some people say that their skin glows after drinking water. I'm not so sure about that, but one things certain...start drinking water and you'll see an improvement in your skin. Not overnight though. It's a process.

Exercise
Exercise, not only makes your body look good, but it can also make you thirsty, thus making you drink water, thus making your skin look nice. See how that works? Circle of life people. Circle of life.

Veggies
Especially veggies that have a lot of water in it. Unfortunately drinking a lot of water isn't enough because you pass a lot of it in the bathroom. But when you eat the water, it stays with you for longer.


Three things. Not so hard. Give them a try next week and see how it goes.

What are your little tips to keep your skin looking nice?


Thursday, January 26, 2012

To Pick or Not To Pick

Shakespeare might roll over in his grave if he found out I was using one of his lines to talk about pimples. But then again, the bard would be so dizzy from rolling over from other things he might not mind.

People always say that you shouldn't pick your pimples at all. It leads to scarring and bleeding and other nasties, but if you're like me and have a compulsion to pick than these are the rules you need to follow.

White Heads
They're the way to go. If it's not white, don't touch it! It's not prime yet.

  • Heat it up first! Take a warm wet rag and hold it on top of the spot and let the warmness open your pore. 
  • Find yourself an extractor. They look like this. 
Don't be afraid! 
  • The extractor pushes on the area around the pimple and pushes the nasty out. But the important thing about them is that they don't create any scarring. 
  • Sometimes, you might need a lancet. Basically, it's the equivalent of a needle, but it's made for your skin. Gently, poke your pimple with the slanted edge facing up. Go at from the side. 

  • If you don't have an extractor, do not use your fingers! Take two cotton swabs and and use those to push on the pimple. 
  • You know when there's nothing left in your pimple whenever it's just blood coming out. 

Blackheads 
  • Pretty much the same as a white head. Heat. Extractor.
  • If you've got a lot of buildup on your nose, apply pressure and pull down with the extractor. But I warn you, it's no walk in the park. It hurts really bad

Post-Care
  • Throw some witch hazel on it. 
Less than $5 at your local drugstore. Can't beat that!
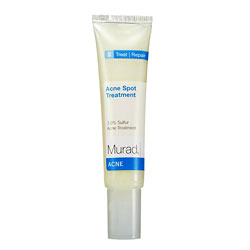
  • Then hit it with Murad's Acne Spot Treatment. It's got 10% sulfur acne treatment in it that will help dry it up. 


So, tell me. Do you pick your pimples properly? Or have you been doing it wrong like I have?


Friday, January 13, 2012

Friday Link Love 1/13/2012


**I caught my microwave on fire. Yup. Just call me Betty Crocker.

Thursday, December 1, 2011

Stress Is Stressful

The holidays are suppose to be a happy time of year, with family, traditions, presents, food, and Santa. But you know what? If you've ever been to Black Friday you know that sometimes shopping for the holidays is stress-ful!

Yeah, no thank you.

But what you might not realize, whether your stress is coming from the holidays, or school finals, or cooking a dinner for you in-laws, stress can be super harmful to your hair and skin.

According, some experts, there are three different types of stress-related hair loss. .

  • Alopecia areata.
  •  A variety of factors are thought to cause alopecia areata, possibly including severe stress. With alopecia areata, white blood cells attack the hair follicle, stopping hair growth and making hair fall out.
  • Telogen effluvium.
  •  In this condition, emotional or physical stress pushes large numbers of growing hairs into a resting phase. Within a few months, the affected hairs may fall out suddenly when simply combing or washing your hair.
  • Trichotillomania.
  •  Trichotillomania (trik-oh-til-oh-MAY-nee-uh) is an irresistible urge to pull out hair from your scalp, eyebrows or other areas of your body. Hair pulling can be a way of dealing with negative or uncomfortable feelings, such as stress, anxiety, tension, loneliness, fatigue or frustration

But don't worry. Stress-related hair loss doesn't have to be permanent. Getting your stress under control is key. Get a massage or facial, take a long bubble bath, cater your dinner instead, or do absolutely nothing for a night. Treat yourself and your hair will be happy.

And just a reminder, always see a professional if you're having sudden hair loss. We just want y'all to be happy and healthy.


Photo 1

Wednesday, November 30, 2011

Hair and Skin Trivia

Since I've been writing this blog, I've been learning a lot of random things about hair and skin. Like for instance, did you know sweat from your apocrine grands (those are the ones that are under your armpit) is odorless. So that smell you smell when you sweat isn't actually the sweat itself. It's the reaction your skin's normal bacteria makes with the sweat. 

Pretty cool right? Or not. Whatever.

So I thought it would be fun to test your knowledge of hair and skin.

Good luck!


Quizzes by Quibblo.com | SnapApp Quiz Apps

Tuesday, November 29, 2011

How To Tuesday: Clarisonic Sonic Cleanser

If you've ever gotten a facial, it is possible that the esthetician used a Clarisonic Sonic Cleanser on you. But if you've never heard of it here's the rundown...


I'm pretty much a sucker for anything in pink. 

On the head of the Clarisonic is a brush that uses a patented sonic frequency of more than 300 movements per second. So hello, ultra clean skin. The little brush removes 6X more makeup than your average washcloth and 2X more oil. 


But the best part is that it is gentle enough to use twice a day, meaning that your skin will be healthier in no time. 

I'm a little intimidated looking at the Clarisonic though. Holding a professional cleaning device in my hands feels foreign, but it is super easy to use. Three steps is all you need to know.


  1.  Charge your Clarisonic. Easy enough.
  2. Wet your face and apply your cleanser to the brush head. Done.
  3. Use a circular motion around the face. All it takes is 20 seconds on forehead, 20 seconds on nose/chin, and 10 seconds on each cheek. Yay for clean skin!


Like I said, easy as pie.

To learn more about the Clarisonic, check out their website


Photo 1, Photo 2

Wednesday, October 19, 2011

Makeup Expiration Dates

Attention. This post is not only informative, but will also keep you from looking like a zombie.


I'm a hoarder. There. I said it. There is something about makeup that makes me not want to get rid of it. Ever. That Clinique gift set I got when I was 16? Still got it. That lipstick color that was all the rage a couple of years ago? Yup.

But you see, this creates a problem. Not only for my skin and health, but also for those around me. Because let's face it. No one likes a girl with an eye infection. And that is exactly what you'll get if you're using expired makeup.

The concept of throwing away expired makeup is new to me, since I'm a makeup hoarder. But it is something that everyone should be aware of.

So here's what you need to know.

Liquid Foundation
     Foundation is the foundation of our makeup. (ha!) But unfortunately it lasts about the shortest amount of time. After about 3-6 months, your foundation is done-zo. So throw it away!

Concealer
     Your concealer can easily get bacteria on it from dabbing it on your face. So typically keep it for only 3 months.

Powders
    That includes your eye shadows, ladies. 1 year. So enjoy 'em while they last.

Mascara
     If you listen to anything from this post, listen to this one. 3 months. No longer. Remember that eye infection I was talking about? You don't want one of those.

Eye & Lip Pencils
     1 year. But make sure you're sharping them once a week.  That will get rid of any lingering bacteria.

Lip Gloss/Stick
     This is what I'm most guilty of. I can't seem to throw any lipstick away. But I must. Every year.

Brushes
     While not technically your makeup, they are a part of your routine. So make sure you're cleaning them with a brush cleaner once a week.

Sponges
     These things can get nast-y. So make sure you're replacing them every week. That's every week.


Monday, October 17, 2011

The Skin Care Routine For You

Oh skin. It covers 100% of our body, is our largest organ, and can account for up to 16% of our body weight. So in case you didn't know, it's kind of a big deal. And therefore you need to take care of it. I've already told you about how important sunscreen is, but just as important as sunscreen is the rest of your skin care routine.

So here's the deal. Every single person needs at least three steps in your skin care routine.

  1. cleanse
  2. moisturize
  3. protect
Simple, right? Step 1 is obvious. You acquire a lot of nasty during the day and night on your face, so you really need to clean that stuff off. Step 2 is to prevent you from looking like an old wrinkly thing. And step 3, well do I need to tell you how hot the sun gets again? 9,941 degrees Fahrenheit. Just use some sunscreen people. 

And you know what? A lot of times step 2 and 3 can be combined into one step. So, hey, bonus!

If your skin is perfect and you don't need to correct anything about it, then well I hate you. But for the rest of us, you might need to add an extra step in your routine. 

If you have...

Redness
      Use an SPF with a green tint. This will help neutralize the redness in your skin. 

Murad Correcting Moisturizer SPF 15, $37.00

Stubborn Blackheads
      And who doesn't right? Get yourself a product with Salicylic acid. 

SkinCeuticals Blemish + Age Defense $78.00
Acne Scars
     Did you know that an Alph-beta peel will fade them even faster than retinol will? 

Crow's Feet
        You're always going to want to keep your eye area hydrated. Just think of them like that aunt of yours no one talks about because she's always asking for another drink. Try an eye cream that has peptides, which stimulate collagen and restore moisture. 

SkinCeuticals Eye Crea, $70.00


Dark Spots
     You need to get yourself a pigment regulator.

SkinCeuticals Pigment Regulator, $85.00

Pimples
     Ah, the bane of our existence. Pimples are the worst. But if you stick with your skin care regimen you'll see results. Don't be impatient though. You skin can take weeks to recycle. But again, try a salicylic acne treatment. 


Did I not mention the skin issue you're having? Let me know in the comments below and I'll help you out!