Thursday, February 28, 2013

Gray Hair 101

Let's face it, gray hair sucks. In fact, it's a multibillion dollar industry...the anti-gray hair industry. Only few people can pull it off. Like Meryl Streep. But let's be honest...she could probably pull off purple hair. Or no hair.


So what causes it?

Something called apoptosis. Basically, the cells located at the base of the hair follicles slow, thus stopping the production of color pigment. It is the lack of pigment that makes the hair appear gray or white. So it's not really your hair turning gray, it's your hair losing its color.

Things that cause hair to turn gray are:

  1. Obviously aging. More than 60% of Americans have some gray hair by the time their forty, but can start getting it as early as childhood.
  2. Stress
  3. Medical conditions. Albinism, malnutrition, Werner Syndrome.
  4. Other factors. Like smoking. Some studies have found a link between smoking and gray hair. Just another reason not to do it.

Do you have gray hair? Do you cover it up, or let if grow free?

Wednesday, February 27, 2013

What is Keratosis Pilaris?

Sounds scary right? But don't worry...keratosis pilaris is something that lots of people deal with and it's not life threatening.

Wikipedia describes it as:

a common, autosomal dominantgenetic follicular condition that is manifested by the appearance of rough, slightly red, bumps on the skin. It most often appears on the back and outer sides of the arm


Simply put, it's those little red bumps that some people get on their arms. Somewhere around 40% of the population suffer from it.  

What happens is, the body produces too much keratin. You know keratin, it's a natural protein found in your skin and hair. So this extra protein has no where to go, so it surronds the hair follicles in the pore, producing little bumps. A lot of times, this causes ingrown hairs to form. 

So what do you do if you have it?

Well, there has been some research the links a deficiency in Vitamin A to keratosis pilaris. So make sure your getting some Vitamin A. 

You also will want to exfoliate the area, to help out with those ingrowns. 

And of course, moisturize. 

Friday, February 22, 2013

Friday Link Love 2/22/2013


Wednesday, February 20, 2013

It's Okay If You...


  • Order the trenta size at Starbucks. Sometimes you need that extra bit of caffeine. 
  • Throw on a hat on those days.
  • Envy those who can do nail art. 
  • Don't brush your hair after your shower...every once in a while. 
  • Put makeup where no one would expect it to cover up a little sometime.
  • Have three different types of shampoos in your shower, and use them all...or just one.
  • Fully intend to DIY, only to just end up buying the real thing. 
  • Have that guilty pleasure show you want no one knowing about. 
  • Or, make a party with your friends with that guilty pleasure show.
  • Don't make your bed.


Send your "it's okay if you..." to cassidy@onstagehairdesgin.com

Tuesday, February 19, 2013

How To Tuesday: Pixie Poof

Today I stepped out of my little pixie box. For two months, I've worn it the exact same way every day. Don't get me wrong, it's super cute that way, but it was like wearing the same outfit every day. I can barely wear the same outfit twice.

We've done a tutorial in the past on a punk rock pixie, but I wasn't really feeling the "punk" today...so I decided to do a similar style, but more polished.


Step 1: Product

While wet, apply some product that will give you some hold. I used Sebastian Whipped Creme. A light mousse, that also makes your hair super soft.

Step 2: Blowdry


 You want to use a round brush to blowdry the hair away from the face.

Step 3: Flat Iron


Again, using the flat iron to smooth, direct the hair away from the face.

Step 4: Pin

Place hair exactly where you want, and use a couple of bobby pins to keep it there. Pin lightly, not too tight, to still give you that poof look.

Step 5: Spray

Didn't really think we'd get through a tutorial without telling you to hairspray did you?


Thursday, February 14, 2013

I Tried It: Edible Sugar Lip Scrub

A couple of weeks ago I posted this recipe for an edible sugar lip scrub. My lips have been feeling a bit dry lately, so I thought it was the perfect time to try it out. It was super easy and I had all of the ingredients already in my pantry. So that's a plus!


The Recipe:

  • 1/2 teaspoon of brown or white sugar
  • 1/2 teaspoon of honey
  • 1/2 teaspoon of olive oil
  • a pinch of powdered cinnamon


Then the directions say to rub all over lips for 2-3 minutes. Wash off. And then put on some chapstick. It was all so easy. This recipe wasn't hard like the other DIY recipes I have tried in the past. It took less the 5 minutes for the entire treatment. 

And my lips actually do feel softer. I don't know if I rubbed for the entire 2-3 minutes. (I had muffins in the oven that needed to come out!) But I did do it for at least a minute. I'm sure they would feel a whole lot softer if I had continued. 

The edible part is for real. It tasted good when it slipped off my lips into my mouth. I wouldn't use a lip scrub unless it was made from real products. Don't want to ingest yucky processed stuff.

The grade: A

Wednesday, February 13, 2013

Top Knot Love

I've got some serious top knot envy recently.

Okay, I've got some serious long hair envy. Don't get me wrong, I love my short hair. But I wear it the same every day. So when I see someone with a top knot, I know that they could also wear their hair down. Or curled. Or a thousand other ways.

Just look at these pretty top knots.


Don't know how to do a top knot? Well...we've done a tutorial on the subject. Or two.

Tuesday, February 12, 2013

How To Tuesday: The Perfect Lip

Valentine's Day is this week, and nothing says sexy like lip stick. It draws the eyes to your lips...and when the eyes are drawn to your lips...well..


Step 1: Line the lip

Lining your lip will help to keep the color longer, but more importantly it will help keep your lipstick from bleeding. No one likes a bleeding lip.

Step 2: Lipstick


Use a lipstick brush. It will help with precision.

Step 3: Blot

Always blot.

Step 4: Lipstick again.

Second layer


That's it. Easy right?

I'd go with red for v-day. 

Friday, February 8, 2013

Friday Link Love 02/08/2013


Thursday, February 7, 2013

Throwback Thursday

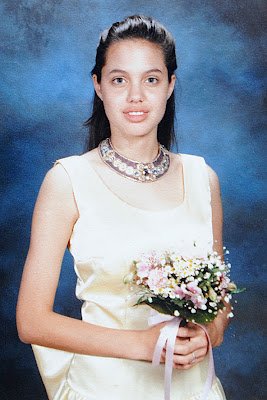
On Instagram they have this tag called Throwback Thursday. It's where you post old photos of yourself, a throwback if you will to your younger days.

I thought it would be fun to do something like that on here every once in a while, but to kick us off...I posting old pictures of celebrities. Because let's be honest. That's really fun.

Kate and Pippa Middleton

Do I even need to say? Just look at those lips. It's Angelina Jolie

Before the Upper East Side got ahold of her: Leighton Meester

Brooke Shields

Way before the adorable pixie: Michelle Williams

Before she started writing songs...Taylor Swift

I couldn't possible leave the Mickey Mouse Club out. Just look at Ryan Gosling there. 


Send your old Throwback Thursday photos to cassidy@onstagehairdesign.com

Wednesday, February 6, 2013

Did You Know You Could: Dye Your Eyelashes


I know right? Dye your eyelashes? Why do you really need that. Well, let me tell you why!

Because, hi...it's like wearing mascara all of the time. At the beach. In your bed. At the gym. So obviously you can't really go wrong.

It's a super simple process too. The dye is applied with your eyes closed. You sit for ten minutes, and then you're done. But if you have watery eyes like I do, be careful. The dye can drip down your face. Just tell your esthetician beforehand!

And it's usually a quick, cheap add on service that your salon can throw in while your already there.

Conclusion: dying your eyelashes is cool.

Tuesday, February 5, 2013

How To Tuesday: Our Top 5 Tutorials

We've done a lot of tutorials. A lot. From makeup to hair to skin to headwear. And, if I do say so myself, they're all pretty good. But some of them stand out from the rest. Here's a list of our top five tutorials.


5. How to lock in a bobby pin

A pretty simple thing. Using a bobby pin. But it's only simple after you know how to do it. 


4. pin back your bangs

Ah yes. The grown-out bangs. There's not much worse. 

Highlights include The Poof, The Braid, The Twist, The Middle Part


No heat curls? Yes please.


Because let's be honest...who doesn't want them?


Three words. Taylor Swift Hair.


Friday, February 1, 2013

Friday Link Love 2/1/2013


Send your links to cassidy@onstagehairdesign.com